
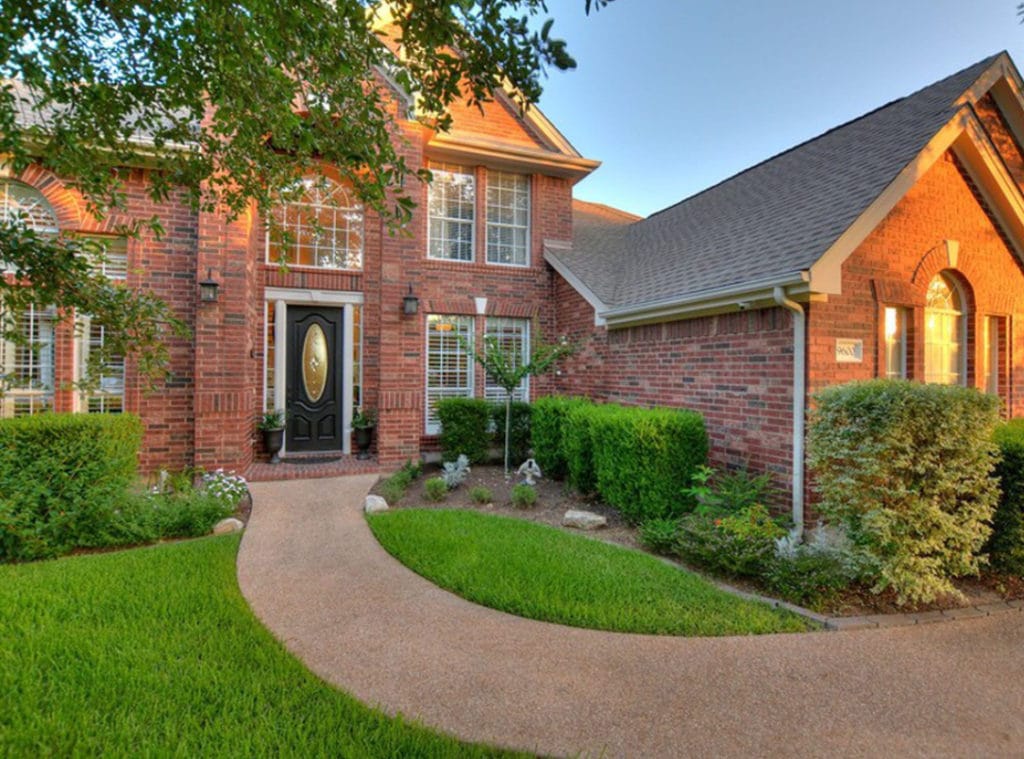
We bought a red brick house built in the 90’s. I didn’t love the red brick but we loved the floor plan and the neighborhood. That is key. You can paint brick. You can’t change the neighborhood or floor plan very easily. Here is a photo of our house when we bought it. It needed a new front door, too. It was original to the house, as you might guess if you know your 90’s home building trends.
My Inspiration
My son is a student at the University of Arkansas. The buildings on the campus are mostly red brick and have a classic southern style. Many of the brick buildings are painted a solid color but some are whitewashed. I fell in love with the look of the whitewashed red brick.
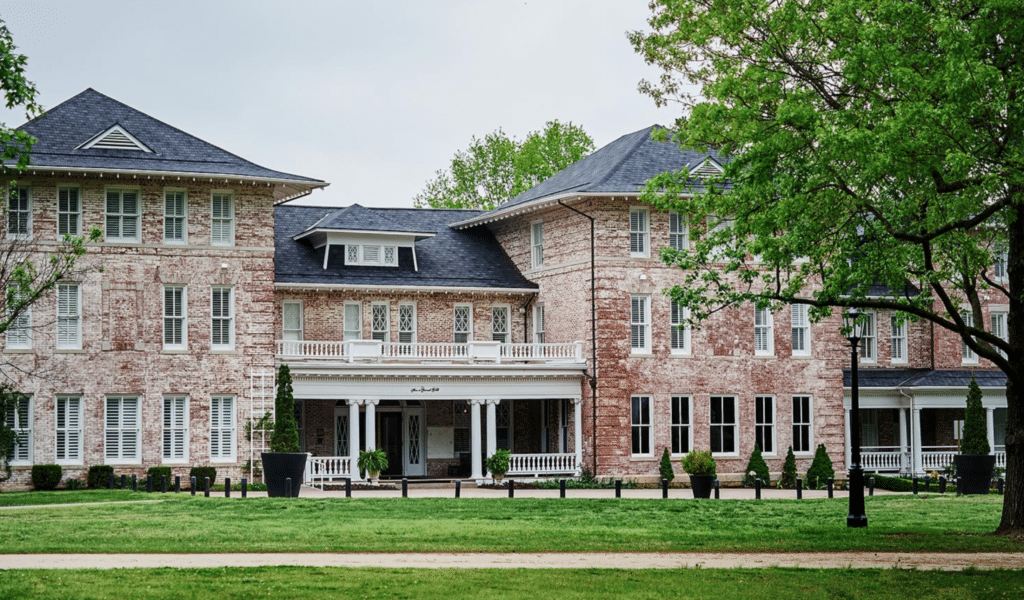
This is the Inn at Carnall Hall in Fayetteville, Arkansas. It used to be a girls dormitory. Isn’t it gorgeous? This was my inspiration.
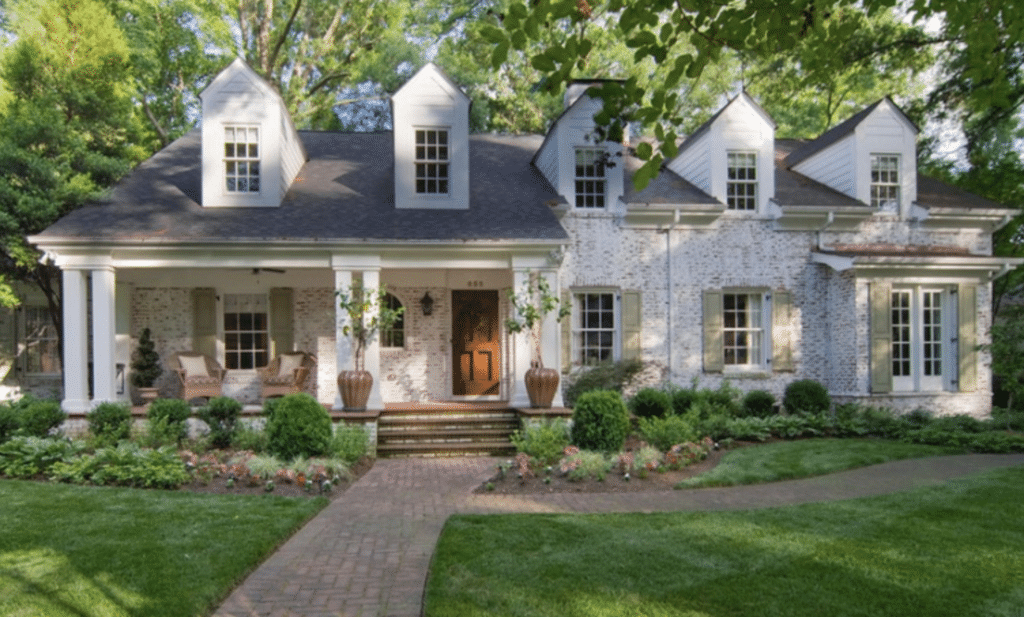
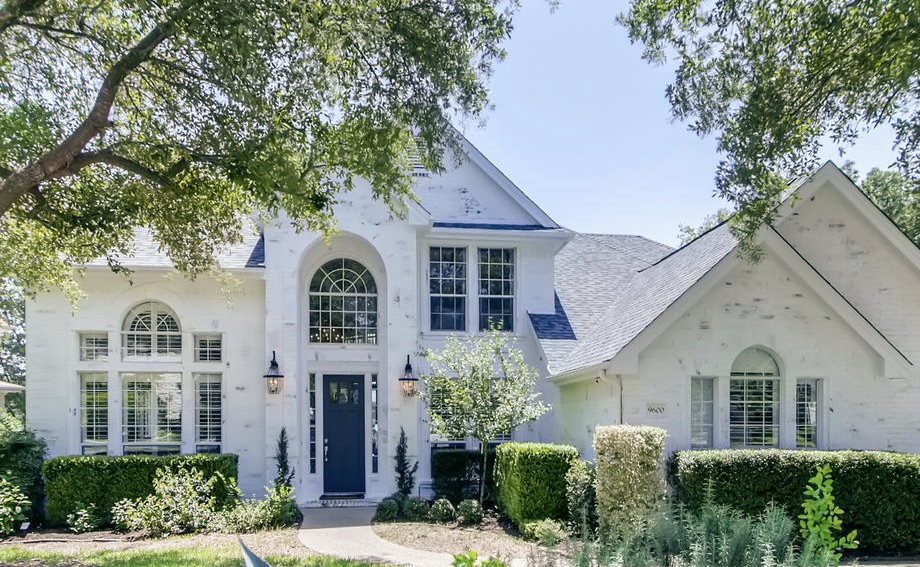
I did some research on how to whitewash a brick exterior. It is also called limewashing and has been around for a very long time. The ancient Greeks and Romans whitewashed their buildings. It is a natural product made from ground limestone. It is very eco-friendly, as well. Here is a photo of another home that has been whitewashed. I liked how this house had more limewash and less brick showing.
The Whitewashing Products & Process
I found a product called Romabio Classico Limewash. It is a slaked lime powder and you mix it with water. There are different consistencies that you can use depending on the look you want. I wanted more coverage with just a little bit of the black bricks showing through. My husband and experimented with it on the brick under our deck. The instructions said to paint it on, let it dry 30 minutes and then wash it off with a hose. We started with a solution of 25% lime and 75% water. That gave the brick a more translucent look. I wanted more coverage so we did a 50-50 solution and got exactly what I was hoping for.
Next I called all my painters and contractors and no one had worked with this product before and were hesitant to try something new. My carpenter/jack of all trades/genius handyman Sergio agreed to take the challenge. He is the best!
First, Sergio power washed the entire house, just to make sure the limewash had a clean surface to adhere to. Then we applied a 50/50 solution with paint brushes so we could paint less on the black bricks. We waited 30 minutes and then washed it off. I say “we”, because I was with Sergio every step of the way to make sure there were no surprises. Eventually, I took the matter into my own hands, put on my rainboots and grabbed the hose because I wanted more coverage on the red brick and less coverage on the black bricks.
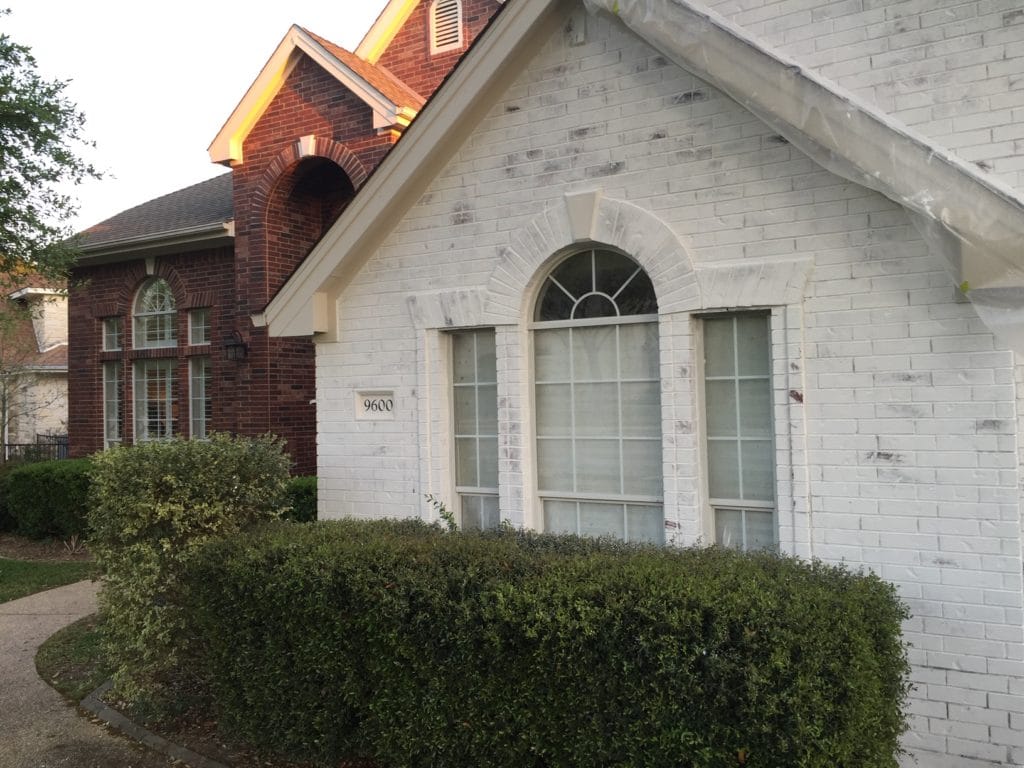
After completing one side of the house I decided we needed another coat. We gave it another coat and then put a hard bristle brush on the end of a broom handle and started lightly scrubbing the brick after we hosed it down. The poor guys were on ladders taking orders from me: “Scrub the area to your right just a little. Okay, maybe a little more. Now can you scrub the area up a little and to your left?” I must have driven them insane but it gave me the look I wanted. Here is the house after day one:
The beauty of the Romabio Classico Limewash is that you can completely customize the finished look. There are several different whites to choose from. We used the Bianco White. If you want more coverage use the 50/50 solution, do two coats and scrub lightly after you hose it down. A 25% lime/75% water solution lightly sprayed on the brick after painting will work better if you prefer less coverage and more of the original brick to show through. Keep tweaking the solution and the application until you get it the way you like it.
The Finished Product – What a Difference!
Here is our brick house painted. We also installed a new front door. It is painted a soft black called Iron Mountain by Sherwin Williams. The new exterior lights make a big difference, as well. They fit the scale of the house much better than the previous lights. Next on the list is to change the color of the roof. I think a charcoal gray roof would look really nice with the whitewashed brick.
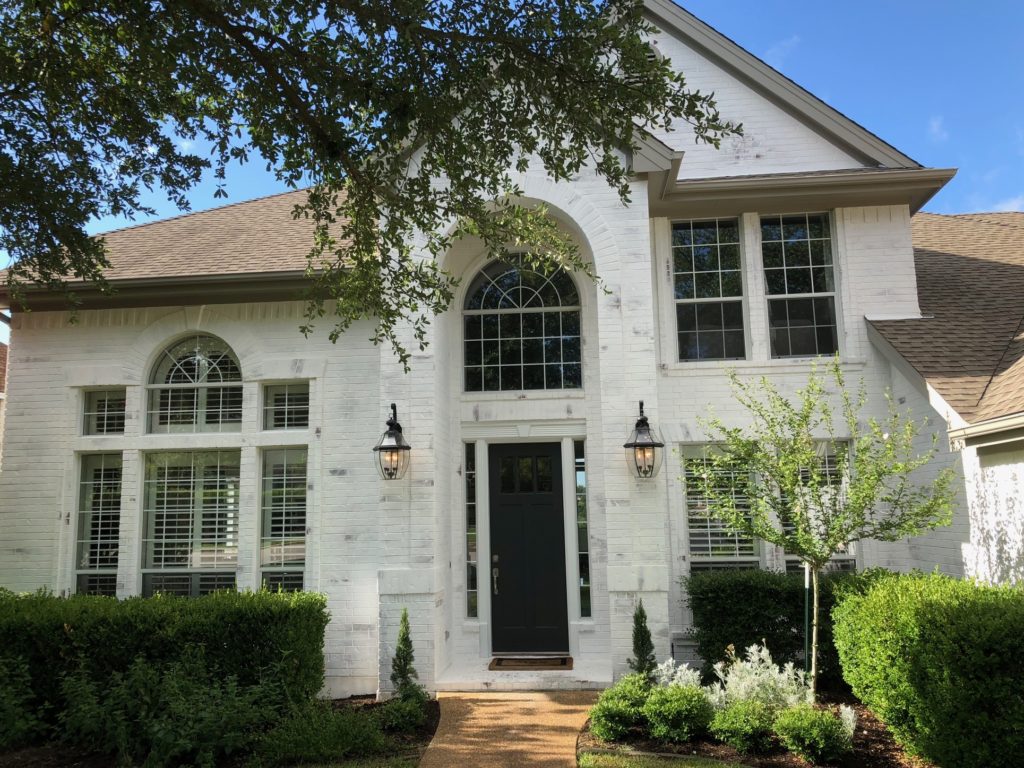
Tip: If you live in a warm climate do the whitewashing in the winter or early spring. We live in Austin, Texas so we did it in March. The limewash calcifies quickly in the heat and then it is not as easy to work with. Romabio recommends the temperature being between 70-85 degrees when you apply it.
Because it is a natural product, it is perfect to use on a brick or stone fireplace, as well. Check out the Romabio website for more information.
Update
We had a hailstorm and had to get a new roof. I choose a charcoal gray roof which looked great with the whitewash brick exterior, but terrible with the Anew Gray trim. We painted the trim Pure White by Sherwin Williams and I love the way it turned out.
I hope you found these tips on how to whitewash a brick exterior helpful. If you are updating your exterior then you are probably considering some interior updates. Check out my blog post Time to Paint for tips on how to pick the best paint color. If you need some help choosing an exterior or interior paint in Austin, Texas I can help! Contact me here.